I decided over the weekend that I wanted to make myself a new tote bag. I've made quite a few of these over the years - they're adapted from an older Missouri Star Quilt Co video. I've changed the size and added some features that I thought were useful, too.
I wanted to use some of this Charley Harper penguin print as a focus fabric for it. I can't even remember where I got it, but it's been in my stash for awhile and never quite fit into any other projects. I'm pretty sure I bought a 1/4 yard of it.
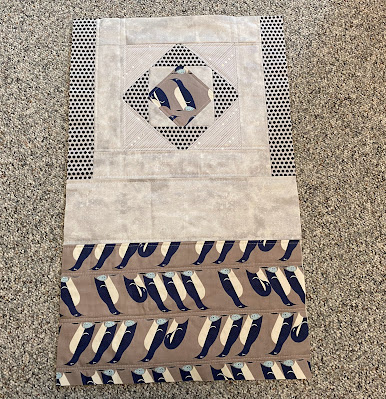
I started by pulling some coordinating scraps from my stash and making this square-in-a-square type block that involved a new technique a local quilty friend shared.
To make this block, I started with a 4.25 inch center, and matched it with a square of the gray the same size. Place the two squares right sides together, sew all the way around with a 1/4 inch seam, and then mark an X from corner to corner and cut it open with scissors to get the first square corners. Press open and you get the first square-in-a-square. You can just keep doing this until you reach the size you want - I did this process three times to get about a 9.5 inch block.
I sewed this block with some more of the penguins, dots, and gray into a big panel that measured 16 X 26. Next step is to quilt it to some batting and trim down to size.
The lighting in this photo makes the background of the penguins look really brown,
but it in real life it's definitely gray!
I turned this into a "box" with a flat bottom by boxing the corners.
Follow the same process with a piece of lining fabric, add some pockets for phone and keys, and a magnetic snap... Handles are sewn in when you layer up the lining and outer part of the bag.
And voila - my finished bag!
The finished tote measures about 15 inches wide X 11 inches tall.
Next up is to get going on the final border of my Stay at Home Round Robin project. More about that in my Saturday post!


